Till a Sunny Spot
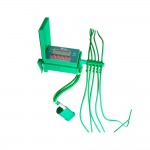
Choose a location that gets lots of sun and access to water. Since there will be no synthetic fertilizers in this garden, it’s critical that the ground be as healthy and rich as possible (Image 1). When making an organic garden, weigh the desire to have organic produce with the extra work that the garden often requires.
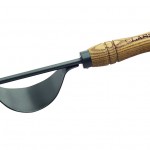
Tilling is one way to make organic gardening a little easier and faster (Image 2). When tilling a garden, there are a couple of things to get done. First, break and loosen the soil so that air and water can move around the plant roots. Second, rake out any clods and rocks. Also, pull any stray weeds or grass so they won’t pop up between the vegetable plants.
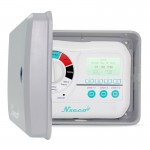
Another way to aerate and loosen the soil, especially if there is lots of clay, is to double dig. Pull back the loose soil from the top 1′ of the garden. Then use a garden fork to loosen the lower hard ground (Image 3). Add compost or manure to the hole so it will get pushed into the holes and cracks.
The open pockets created by double digging give plant roots a place to find food and water. This makes the plant healthier and more drought-tolerant. Double digging is very labor-intensive, but the quality of vegetables grown is worth it.
Work in the Compost
Compost is an organic gardener’s best friend (Image 1). Compost is fertilizer, mulch and weed preventer, all in one. If there is not a compost pile to draw from, then compost can be purchased by the bag or truckful. Because an organic garden won’t have the benefit of synthetic fertilizers, the compost must be worked deeply into the soil. The deeper the compost is worked in to the soil, the easier a plant will grow into the soil. Then it can put all its energy into producing vegetables.
One way spread compost spread through garden soil is to till it in (Image 2). But not at the first tilling because the goal of the first tilling is to break up and clean out the soil. Going through the garden a second time to work in compost makes the soil even healthier.
The upper soil zone, the first 6″ to 10″, is where most of the small feeder roots grow on vegetable plants. To make sure these roots get the food they need, spread a 2″ to 4″ layer of compost (more if available) over the whole surface of the garden (Image 3). Remember, be generous.
Make several passes to get the compost worked in well. Continue to rake any clods and rocks between passes. Once the ground is loose and the compost is fully mixed, divide the garden into individual beds.
Divide Into Beds
For a large bed or garden, divide it equally into squares, leaving a 2′-wide path between the sections (Image 1). This will create separate deep mounds that are narrow enough to work around and to reach across. The deeper the soil is, the quicker the plants get growing.
One way to keep stray plants and weeds out of the garden is to cover the rows with newspaper and straw. The paper cuts out light and air, and the straw makes it look neater and keeps the paths cooler. Once the papers are down, wet them until they’re heavy and set in place (to keep them from blowing away).
Then apply a 2″ layer of dry straw on top. Landscape fabric is another good way to prevent weeds in garden rows (Image 2). It’s easy to lay out, and it can be pulled at the end of the season, before tilling for your next crop.
Out With the Weeds and Pests
All of the tilling and compost has stirred up weed seeds and possibly bacteria and fungus in the soil. One way to prevent problems is to solarize the soil. This means heating up the ground enough to kill weed seeds and soil borne diseases. Heavy black plastic tacked down over the beds is the most common way to do this. It’s best to leave the plastic for a few weeks or months. In addition to making the soil healthier, it also warms it up for the new plants.
Check the temperature of covered organic beds to see whether they are hot enough to uncover and plant vegetables. Once the soil temperature gets above 100 degrees, a lot of pests and diseases just won’t make it.
